
A Beginner's Guide to Shaders

Ever since shaders were introduced in Löve (previously called Pixel Effects) they have been shrouded in mystery and myth. The only way to learn these mystical black arts was to scour the examples others have made in hopes of learning by tweaking enough code.
Hopefully, we can change that! By providing a straightforward guide, more people can learn and integrate shaders into their own projects!
This tutorial will teach you how to set up a basic pixel shader as well as attempt to explain what everything does.
What is a shader? (background info)
All the code you normally write runs on the CPU. As a general purpose unit, that works great for most things. The problem with your CPU is that it is sequential. It runs the instructions it''s given in the order they are written. Even with multi-core computers and multi-threaded applications, you have a limited number of cores and if they are processing the same data, they have to wait until the other is finished with it anyway.
Your GPU on the other hand has thousands of cores. It''s built specifically to be able to run instructions thousands or millions of times in parallel. The catch is, it can only run the same piece of code on all these cores at any one time. (This isn''t exactly how it works, but for all intents and purposes, it''s a good way to think about it)
What can I do with shaders?
Shaders can be immensely useful when making games or any sort of graphics work. You only need to look through the Share A Shader thread for a few moments to see all the impressive work.
If you want to do any sort of realistic/dynamic lighting, you''ll need shaders.
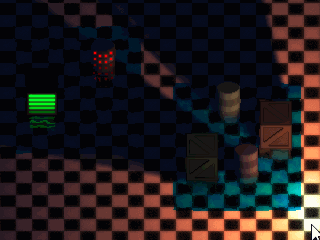
Screens taken from PriorBlue''s Love vs Shadow engine
Learning how to use shaders in Löve will also teach you how to use them in any other application/platform, since the fundamentals are the same. Just look at all the stuff you can do!
Not only that, but you can potentially leverage the awesome parallel processing power of GPU''s to crunch more than just graphical data, but we''ll discuss that later on.
Let''s make a shader!
There are two kinds of shaders. A pixel shader (sometimes referred to as a fragment shader) whose code runs on all the pixels, and a vertex shader which runs on the vertices of your primitives. We''ll start with the pixel shader.
To set everything up, here''s a standard main.lua you can use.
function love.load()
  myShader = love.graphics.newShader[[
    vec4 effect( vec4 color, Image texture, vec2 texture_coords, vec2 screen_coords ){
      vec4 pixel = Texel(texture, texture_coords );//This is the current pixel color
      return pixel * color;
    }
  ]]
end
function love.draw()
  love.graphics.setShader(myShader) --draw something here
  love.graphics.setShader()
end
Now let''s step through this.
The first thing we do is create a shader using the function love.graphics.newShader. This will return a Shader object.
To apply this shader, we call love.graphics.setShader in our draw function. Calling the same function with no arguments will disable any shaders. In the above code, only things drawn between the two function calls will be affected by our shader.
Try loading in a simple image and drawing it (or just draw a circle or anything).
This is the example image I''m using, and this is how it looks like when rendered.
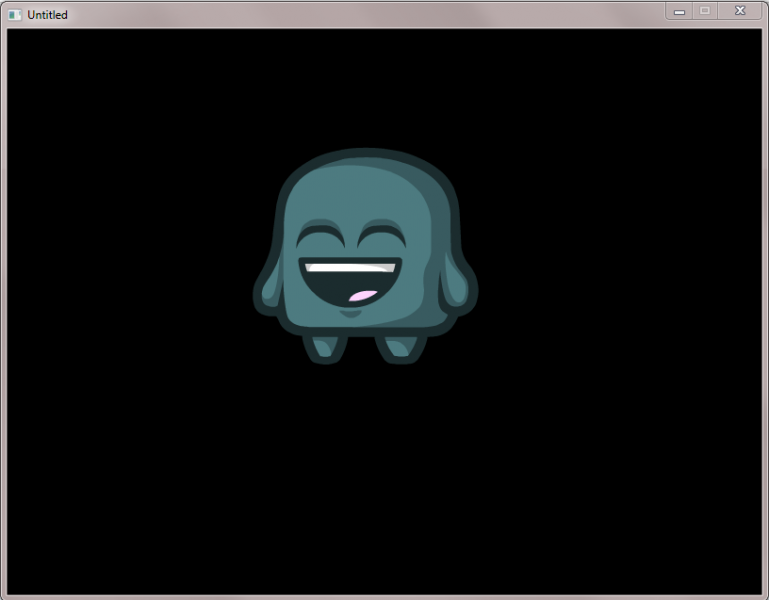
You should see it exactly as if there was no shader. To understand, let''s look at the actual shader we wrote.
What language are shaders written in?
We can see that we''re passing a big string to the newShader function. It doesn''t look like Lua. Shaders in Löve are written in GLSL (OpenGL Shading Language) but with a slight variation. This is important to note because the resources you can look up don''t have to be Löve-specific (or you can try porting shaders from other platforms for practice!)
| GLSL | LÖVE shader language |
|---|---|
| float | number |
| sampler2D | Image |
| uniform | extern |
| texture2D(tex, uv) | Texel(tex, uv) |
These are the only differences. You can look up the documentation of GLSL (Löve uses version 1.20) to learn more about any function.
Now let''s look at the shader code in more detail:
vec4 effect( vec4 color, Image texture, vec2 texture_coords, vec2 screen_coords ){
  vec4 pixel = Texel(texture, texture_coords );//This is the current pixel color
  return pixel * color;
}
We know that everything gets passed through this shader before it is drawn, and this code here will run on every pixel in parallel.
GLSL syntax is more akin to C/C++ than Lua, so don''t forget your semicolons!
The entire job of the pixel shader is to return the final color of this pixel. The return type is a vec4, which means it''s a vector with 4 values. These correspond to the red,green,blue and alpha channels, each taking a value from 0 to 1.
Let''s try something even simpler. Remove all that and just return a new, custom color.
vec4 effect( vec4 color, Image texture, vec2 texture_coords, vec2 screen_coords ){
  return vec4(1.0,0.0,0.0,1.0);
}
Try to guess what this will look like before running the code.
It returns a red color with full alpha, so regardless of what you draw, or what color you set with love.graphics.setColor, it will appear red.
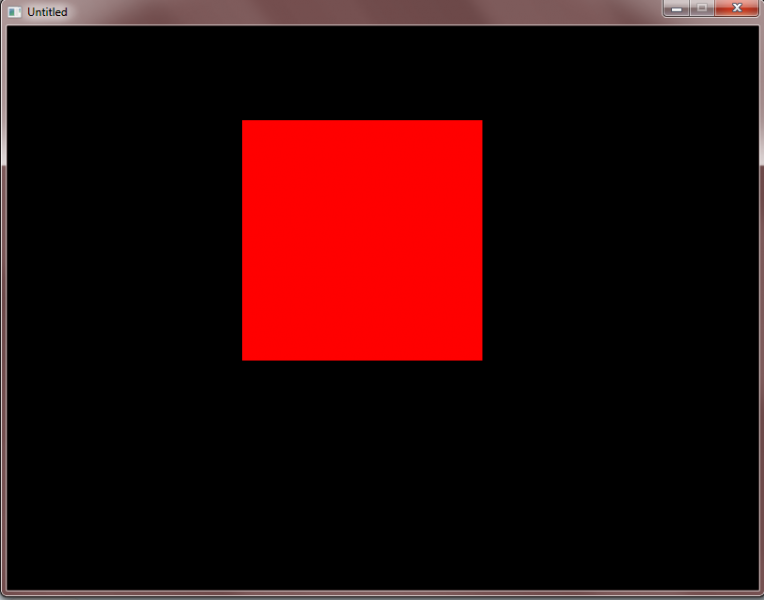
You might also notice that, if you try to draw any external image (as in, not a circle or polygon with the built in drawing API) it will come out as a red rectangle. This is because you''re also overriding the transparency of each pixel.
Each pixel will get this specific color.
So far, this isn''t very useful. It would be more benificial if we had access to information about each pixel so we can better manipulate the image. Let''s look at the arguments passed to us.
What do the arguments mean?
The first argument, a vec4, is the color set during love.graphics.setColor.
The second argument is the image itself being drawn.
The third is a vec2, of the normalized coordinates of the current pixel, relative to the image.
The fourth is a vec2, of the coordinates of the current pixel, relative to the screen.
Let''s try to make use of the last two coordinates to illustrate how they work.
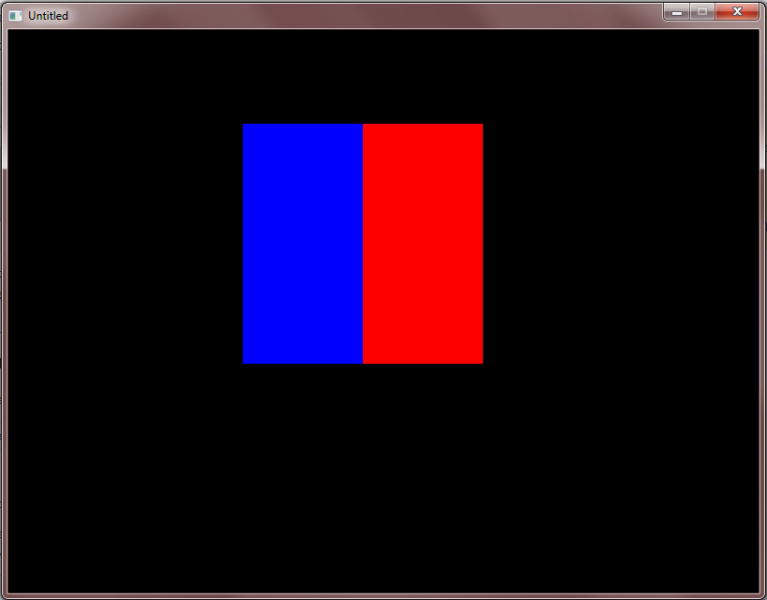
Say we want to make a shader, that will turn the right half of the image red, and the left half blue.
vec4 effect( vec4 color, Image texture, vec2 texture_coords, vec2 screen_coords ){
  if(texture_coords.x > 0.5){
    return vec4(1.0,0.0,0.0,1.0);//red
  }
  else
  {
    return vec4(0.0,0.0,1.0,1.0);//blue
  }
}
Since the texture_coords are normalized. This means that x=0 is the leftmost point, x=1 is the rightmost, and x = 0.5 is just at the center (you can see how convenient this is).
So regardless of where you draw your image, the right half will be red and the left half will be blue.
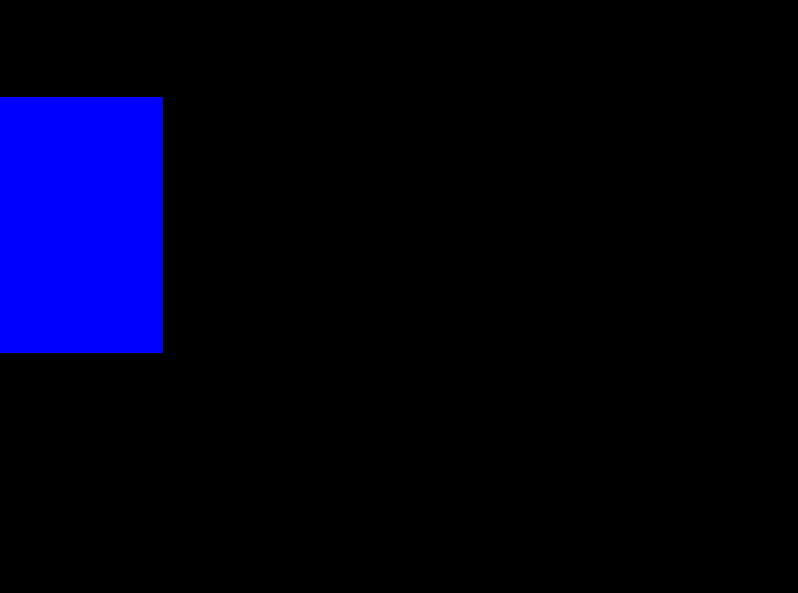
What if we wanted to do the same thing, but relative to the screen.
In other words, we want anything drawn on the right side of the screen to be red, and anything on the left to be blue.
vec4 effect( vec4 color, Image texture, vec2 texture_coords, vec2 screen_coords ){
  if(screen_coords.x > 400){
    return vec4(1.0,0.0,0.0,1.0);//red
  }
  else
  {
    return vec4(0.0,0.0,1.0,1.0);//blue
  }
}
Given that the screen_coords are not normalized (and assuming your screen width is 800), this will make the image completely red if it''s drawn on the right side, vice versa for the blue, and between will work as expected.
How can I get the color of the current pixel before changing it?
This is probably the most useful information you can use. Let''s say we want to give our game a monochromatic feel. All you''d have to do is average out the 3 color channels. (Or something simpler, removing the blue channel from everything will also give it an interesting tinge)
These all sound simple, but how do you get the color of the current pixel?
That''s where the Texel function comes in.
It''s pretty straightforward, it takes the texture (image) and the coordinates of the pixel relative to that texture, and returns the color. You conveniently have both passed as ready arguments, so all you have to do is plug them in.
vec4 effect( vec4 color, Image texture, vec2 texture_coords, vec2 screen_coords ){
  vec4 pixel = Texel(texture, texture_coords );//This is the current pixel color
  number average = (pixel.r+pixel.b+pixel.g)/3.0;
  pixel.r = average;
  pixel.g = average;
  pixel.b = average;
  return pixel;
}
And there you go! We just made a shader that transforms everything into black and white in real-time!

Combining our knowledge
Now let''s try making it gradually go from full color to black and white across its width. I''ll wait here if you want to try figuring this out yourself.
Go on, I''ll wait!
When the r,g and b all have the value of the average, it''s black and white. The farther away it is from the average, and the closer it is to its original value, the image becomes full colored. Given this, we can make these simple equations:
vec4 effect( vec4 color, Image texture, vec2 texture_coords, vec2 screen_coords ){
  vec4 pixel = Texel(texture, texture_coords );//This is the current pixel color
  number average = (pixel.r+pixel.b+pixel.g)/3.0;
  number factor = texture_coords.x;
  pixel.r = pixel.r + (average-pixel.r) * factor;
  pixel.g = pixel.g + (average-pixel.g) * factor;
  pixel.b = pixel.b + (average-pixel.b) * factor;
  return pixel;
}
We use the normalized x coordinate as our gradient factor, and we get a gradual black and white image!
It should be very easy to make it go to black and white gradually over the entire screen instead of per-image, we''ll just change the factor into screen_coords.x divided by however wide our screen is.
This sounds annoying though. Do we really have to hardcode in the width of the screen in our shader?
How do I send variables to my shader?
Of course there''s a way! And that is, Shader:send
The first thing is to set up the shader to receive the variable. In this case, it''s our screen width. So it''s only 1 number. External variables need the prefix "extern" (note: in normal GLSL, that would be "uniform")
extern number screenWidth;
vec4 effect( vec4 color, Image texture, vec2 texture_coords, vec2 screen_coords ){
  vec4 pixel = Texel(texture, texture_coords );//This is the current pixel color
  number average = (pixel.r+pixel.b+pixel.g)/3.0;
  number factor = screen_coords.x/screenWidth;
  pixel.r = pixel.r + (average-pixel.r) * factor;
  pixel.g = pixel.g + (average-pixel.g) * factor;
  pixel.b = pixel.b + (average-pixel.b) * factor;
  return pixel;
}
External variables are declared outside the function, as you can see in the above example.
Then you can run the command
myShader:send("screenWidth",800)
From anywhere in the code. (I''m using 800 for simplicity but you can of course get the width dynamically through love.window.getWidth )
It is worth noting two things about the send technique:
- Communication between CPU and GPU is generally expensive. You don''t want to be sending hundreds of variables per frame
- What goes to the GPU, stays in the GPU. This is very convenient because it means you don''t have to send everything every frame. You can send the screen width once when you create the shader, and again if it ever changes.
And you''ve just made a snazzy gradient monochromatic shader!

Built-in variables
There''s a special note about the screen size. Since it''s such a common thing to use, Löve has provided it as a built in variable. You can use it by accessing love_ScreenSize.x or love_ScreenSize.y at any time in your shader. This is only available since 0.9.1
Another common thing to send to a shader is a time variable. Let''s say you want your image to slowly become black and white over time. It''s the same idea, except the factor will be an extern time variable instead of x or y coordinate.
Here's a .love of the effect I just mentioned.
Parting Thoughts
I hope you''ve enjoyed this guide! That should be everything you need to know to have a basic grasp of how shaders work, and get started. Please let me know what parts were helpful and what were confusing so we could improve this guide.
There''s a lot of other things we could discuss in future tutorials, such as vertex shaders, ways to send larger amounts of data to the GPU (or using it for general purpose calculations as we hinted at earlier), live-updating your shader code so you don''t have to recompile to see changes.
One of the biggest challenges for me in shaders was figuring out how to do self-propagating shaders. By that I mean, all the manipulations that you do to the screen are not saved. What if you wanted to make something that continually distorted an image, building onto its previous iterations?
A very common use for this is a smoke/fluid shader
These are all things we could discuss in future posts, but for the time being, you can see the code for the smoke shader here.
Comments
hmans
Wed, 10/29/2014 - 08:51
Permalink
Thanks. Now on to the mentioned future posts! :)
DarkShroom
Sat, 12/09/2017 - 08:31
Permalink
The smoke shader does not work on the latest love version
I have edited it on the forum (unable to save link due to spam filter)
Albur Godwin
Tue, 01/04/2022 - 05:56
Permalink
Here is a spaced version of the URL (I managed to find your forum comment using the date of your comment here, but I think a link is still nicer):
(remove spaces)
love2d . org/forums/viewtopic . php?p=216998#p216998
(For the record, I had the same idea as you had, but read the Love2D documentation too quickly and thought the new clear was clearing all canvases at once… Absent-minded me.)